
Well from now on my pictures will be… BAM! RED!
It may be my hair colour fascination these past few years, but when I feel bored of my look, I like to make a big change. These years, it’s been changing my hair colour. Last summer, I had a fascination for ombre hair (the newest hair trend of that season). I went against the trend and got myself a professionally treated red ombre at the salon. The red quickly faded to orange then to blonde and I recoloured my hair back to a normal dark brown at another salon to look professional for interviews. This sounds like it’s going to be a lengthy hair story, I’ll leave the rest of the story for a future post dedicated to my many hair troubles/changes.

This was my red ombre hair from a year ago. Good times, good times.
To sum up, after that spout of midterms, which had made me MIA from the blog, I felt that a change was necessary. Back in May, I wanted to have dark purple hair this summer, but the people at the salon turned my hair into a caramel colour instead, far from what I was hoping. After watching SISTAR’s recent MV (they’re a Korean Pop girl group), the member’s hair colours inspired me to recolour my hair. However, since I am a poor university student, going to the salon again was not an option, instead I opted to buy hair dye and colour it myself.
Today I will give you a run down of the product, show you pictures of the product itself and reveal the before and after hair colours.
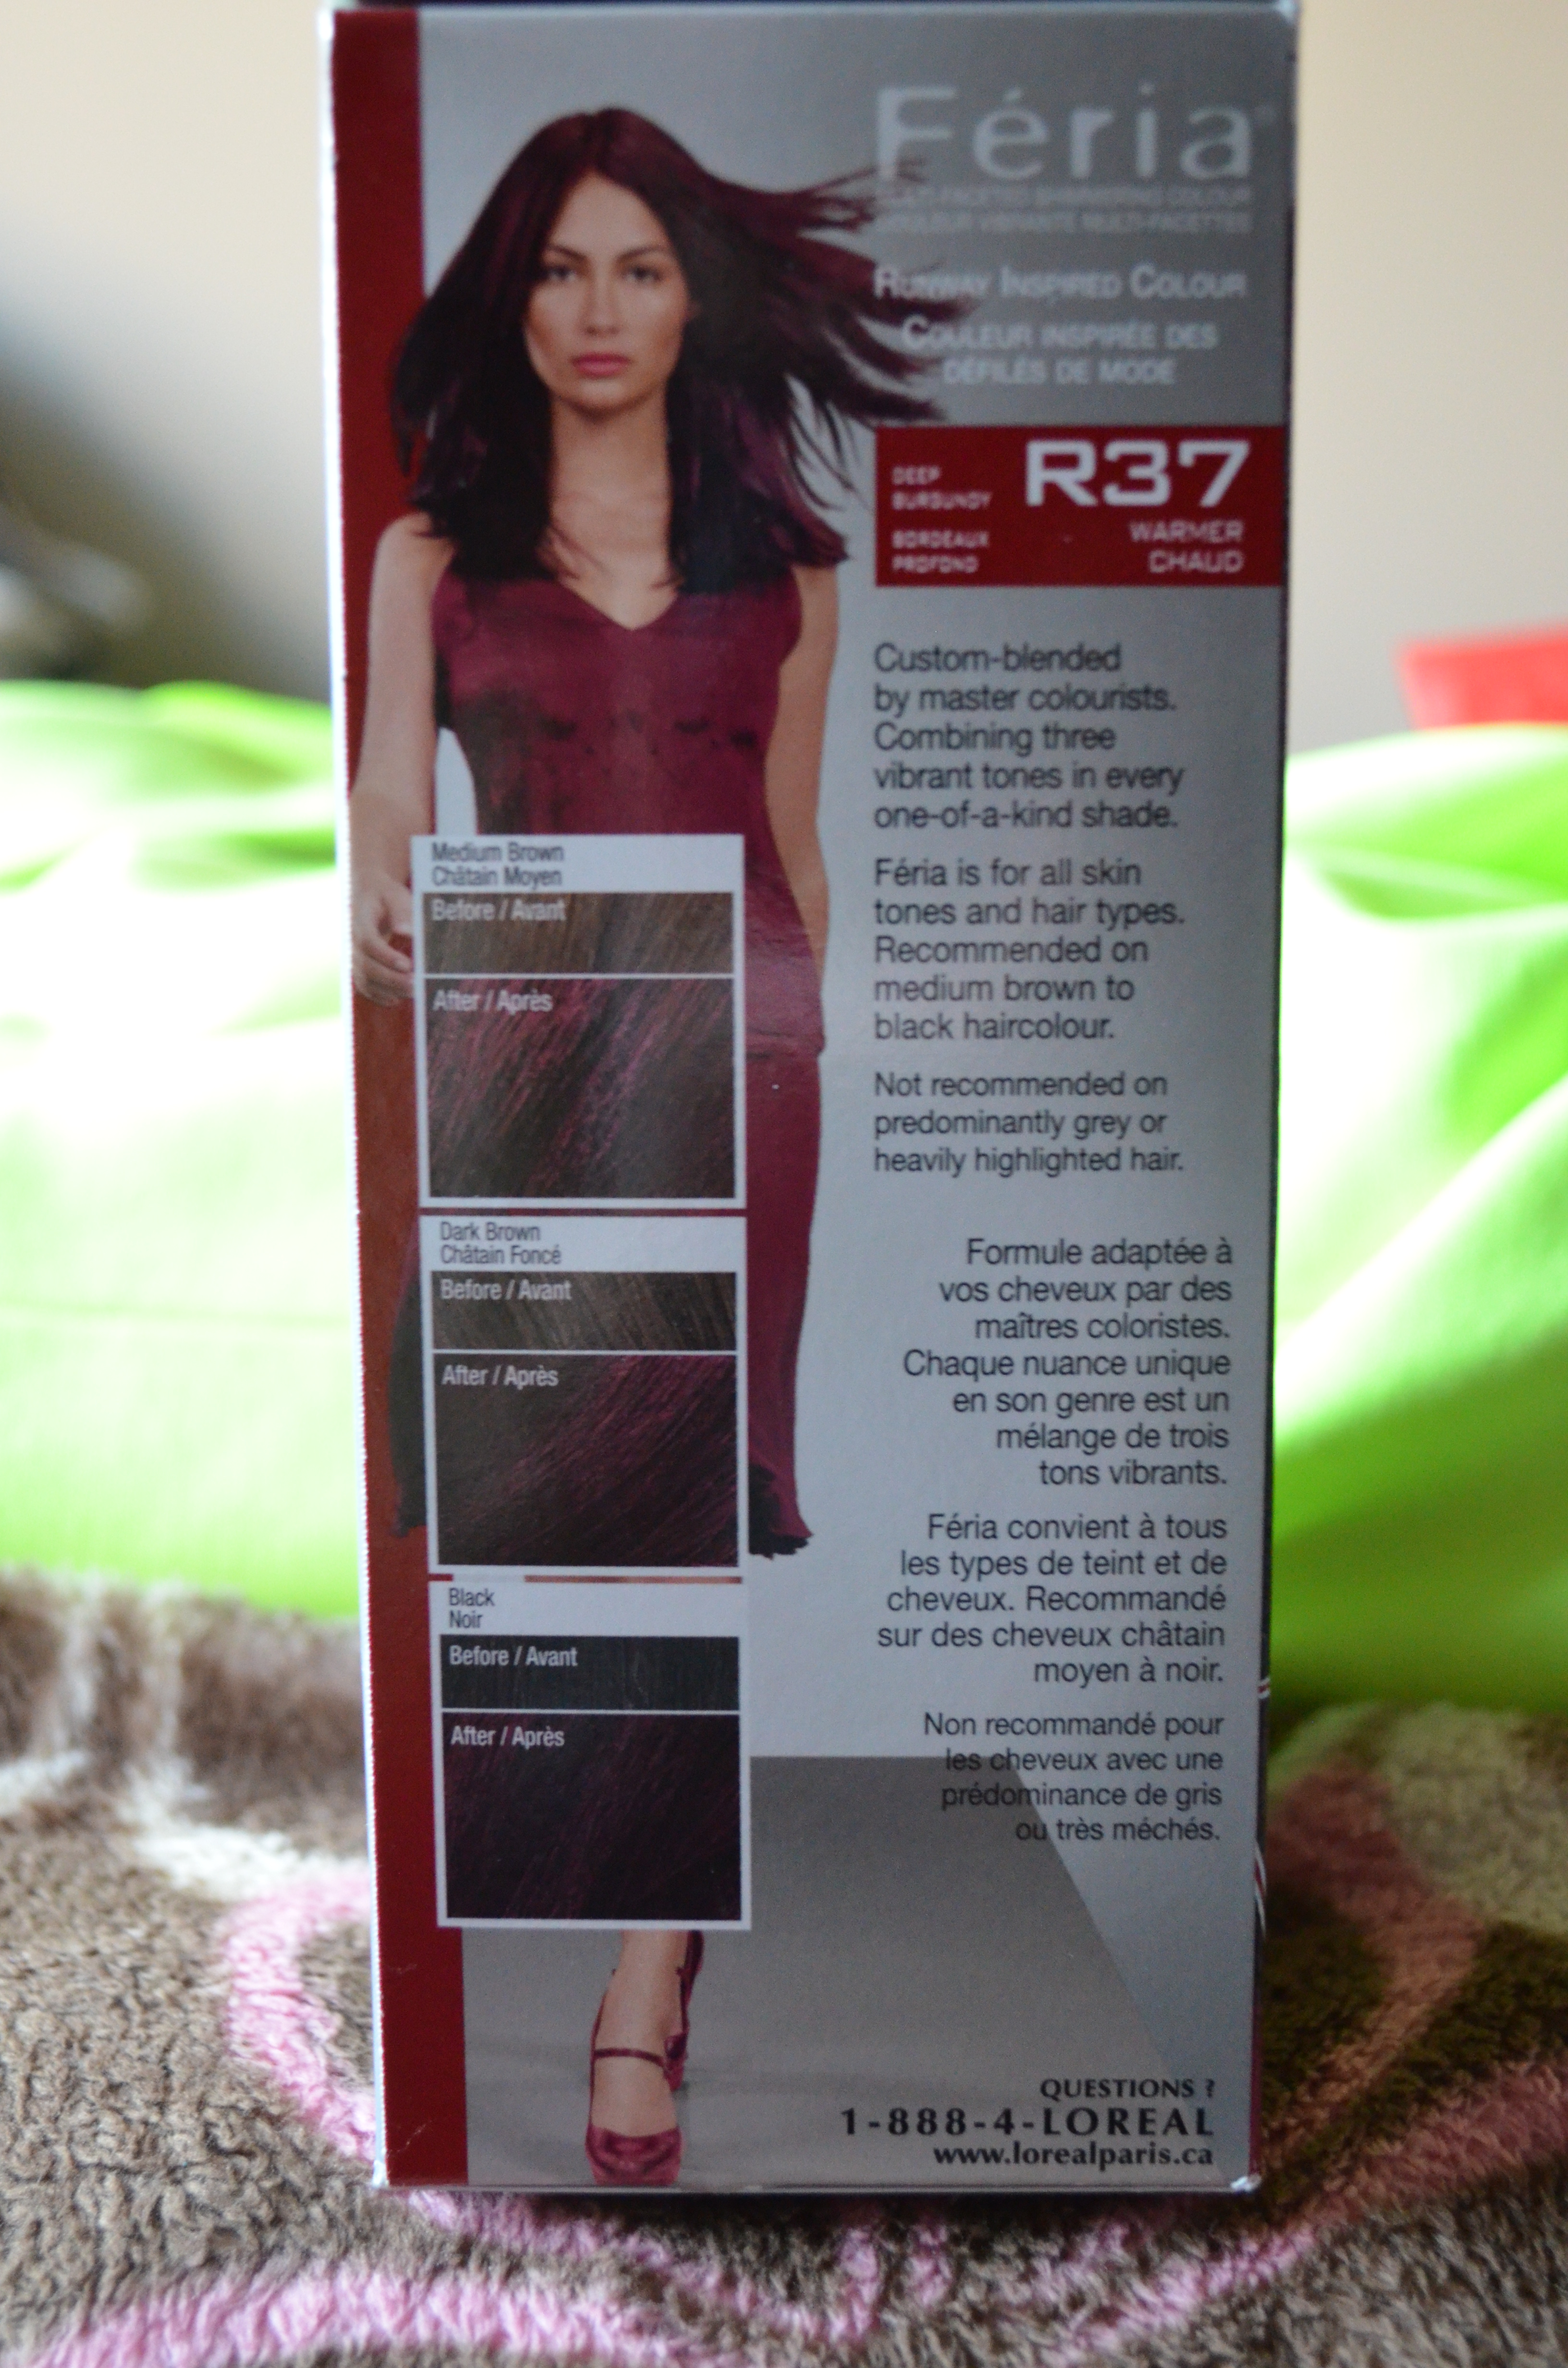
The product: L’Oréal Paris Féria in r37
Colour: Deep Burgundy (R37) [A mix of red and purple, more on the red side]
Price: $11.99 at Shoppers Drug Mart (regular price is $16.95, I bought mine on sale!)
Products in the box: (1) Red Coloured Hair Dye (small red bottle), (2) Bleach and applicator bottle, (3) Feria conditioner for red hair, (4) Deep Burgundy hair colouring, (5) Hair Serum (similar to Biosilk), (6) Clear gloves, (7) Instructions sheet
Leave in Time: recommended 25 minutes. (I left it in for 40 min. Leaving the hair colour in longer before washing it out would not have any adverse affects, just don’t sleep on it and you MUST wash it out.)
Level of Messiness: High (If a brush was provided or on hand, it would be much easier to apply to the hair, the bottle given is pretty much useless except to pour out the hair dye.)
Issues: It was definitely a mess after applying the hair dye. Since the dye was red, my washroom looked more like a crime scene. Yikes! As I said, having a brush would lessen the hassle and mess. However, even after making a mess, you don’t need to worry, the dye can be easily cleaned with some colour water and towels.I would recommend not to throw your dyed towels in the wash with white clothes. Even if the dye has dried, it will become soluble in the washing machine and transfer to your whites, a lesson I have now well learned. My second issue with this hair dye as supposed to other hair colourings and dyes is that the colour in my hair continues to run during showers. Normally after the first time you wash out your hair colour, you are supposed to wash out all the colour and apply the conditioner given to lock in the colour. After that, the colour should not continue to leak after future washings. Today, I have washed my hair for the third time and the colour continues to run and leave dye on my towels, not a good sign. Hopefully that doesn’t mean my hair colour is quickly fading. After a few weeks I will let you know the progress of my hair colour on Instagram and Facebook, so don’t forget to follow me on those media outlets.
Let’s take a closer look at the box and it’s contents.


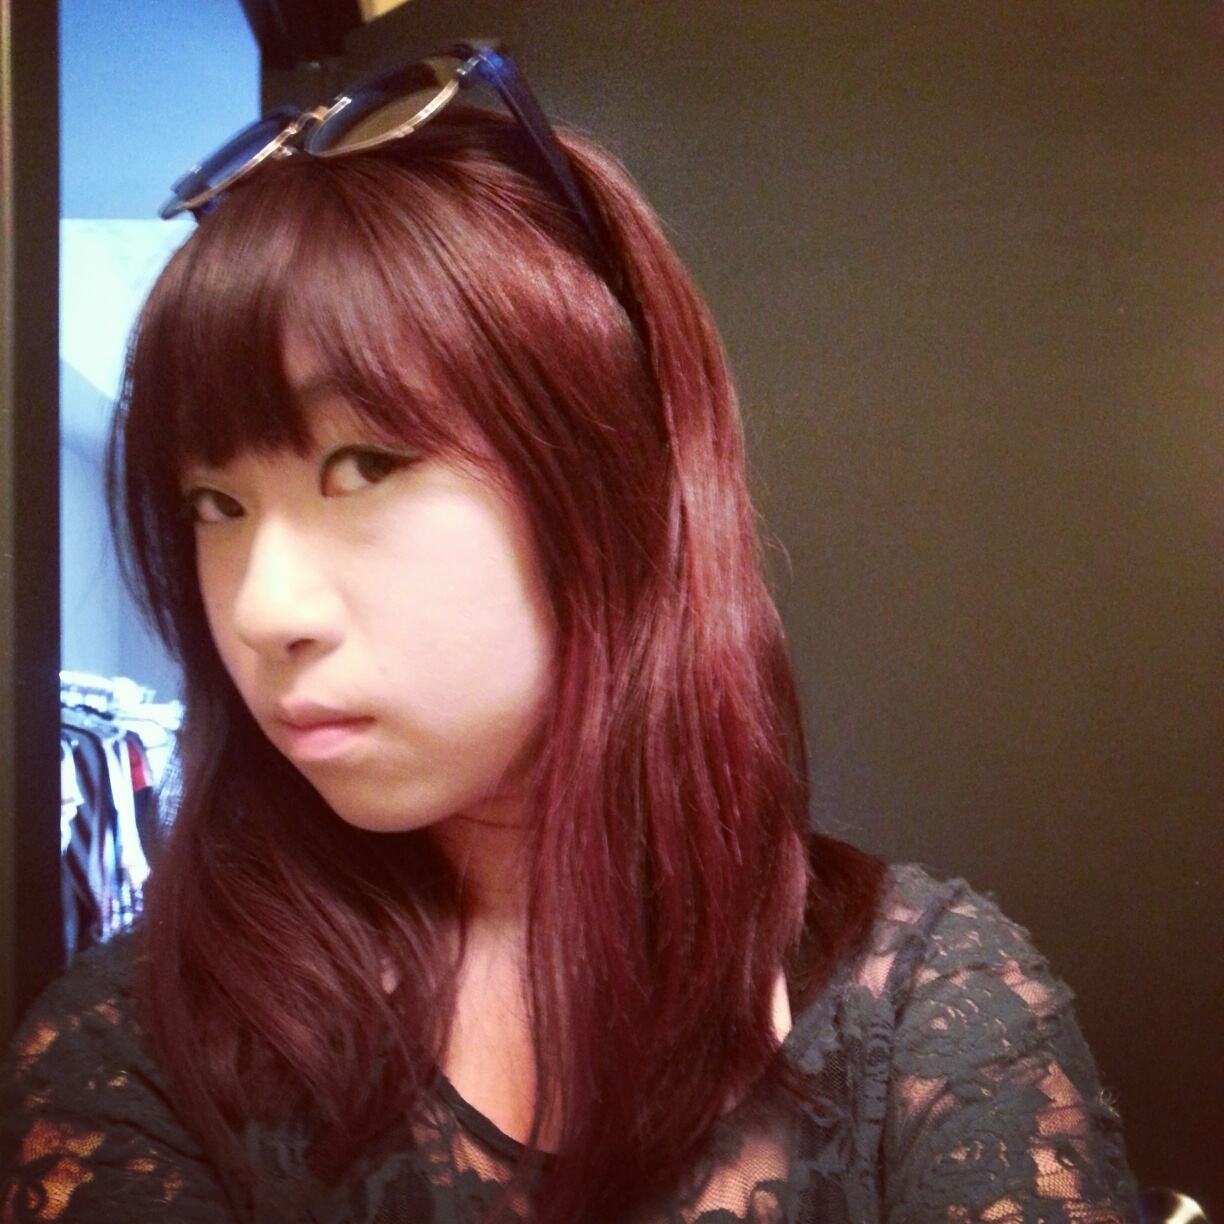
Here’s my hair transformation

Boring old colour…If you can’t already tell, I like to make funny faces 😀

New colour! So excited!!!

Morning after my hair colouring. I don’t want to wake up, let me keep sleeping.

Out in the sun.. “IT’S TOO BRIGHT” says the vampire. Gasp!

Left side. I’m hiding in my room today.

Right side. I don’t see no red! Do you see it? I think I’m getting old.
Hope you like my new hair colour as much as I do. Let me know what you think of the colour, what colour you would love to dye your hair and your hair colouring disasters!


 Close-up with my nude lipstick (MAC’s Viva Glam Lady Gaga) around the edges.


